Wednesday, March 2, 2011

Umbilical Hernia Repair

Today Nixon went in for surgery on her umbilical hernia.  An umbilical hernia develops when a portion of the lining of the abdomen, part of the intestine, and/or fluid from the abdomen, comes through the muscle of the abdominal wall. Hernias are common in premature babies because as the baby develops during pregnancy, there is a small opening in the abdominal muscles that allows the umbilical cord to pass through, connecting mother to baby. As the baby grows after birth, this opening in the abdominal muscles closes. Sometimes, however, these muscles do not meet and grow together completely, and a small opening remains. This opening is called an umbilical hernia.

Although I was reassured by a number of doctors that umbilical hernia repair is a routine procedure, and that everything would be fine, I just can’t help but be upset and anxious about the whole thing. Most babies have the surgery AFTER their first birthday, not at 5 months old. Nixon is so small, and she’s been through so much already, the last thing she needs is another night in the hospital.


She did well throughout the whole ordeal. When she was out of surgery I held her and tried to comfort her until they could set us up in a room. After the initial recovery period  we were moved into a room, and Nixon’s Grandma Julie, who had been with us throughout the surgery, held and comforted Nix while Adam and I ate (we were starving because we had forgotten to eat before we left for the hospital).  


Once the pain medication started to wear off I could tell she was getting pretty irritable, and it was so hard to have to work around all of the IVs and other monitors they had her connected to. I thought we were past this!!!

Nixon continued to be pretty cranky until one very special nurse came in. She was an older lady with a heavy Australian accent and Nixon couldn’t get enough of her voice! Adam and I had never seen her smile and coo so much for a total stranger, and it warmed my heart that the nurse was able to cheer her up.

Since there wasn’t any room for Adam to stay at the hospital with us, he went home for the night, so he would be rested in the morning. I stayed (obviously) and the next morning Meghan came to pick us up and take us home (since Adam had my car).

Nixon is doing MUCH better with her new “innie” and the surgery has definitely made pooping and farting easier and more productive for her! For such a tiny baby she farts like a man!

Auntie Hannah was with us in spirit!
(The waiting room had a big Seahorse!)


Sunday, February 20, 2011

Stuffed Bell Peppers


• 6 green (or red)  bell peppers, tops cut away and seeds removed
• 2 tablespoons vegetable oil
• 1 cup chopped yellow onions
• 1/2 cup finely chopped green bell peppers
• 1/2 pound ground beef
• 1 tablespoon minced garlic
• 1/4 cup finely chopped fresh parsley leaves
• 3/4 teaspoon salt
• 1/2 teaspoon ground black pepper
• Pinch red pepper flakes
• 2 cups cooked long or medium-grain brown rice
• 1 jar pasta sauce
Shredded mozzarella cheese


Preheat the oven to 350 degrees F.
In a large pot of boiling water, boil the peppers until just tender, 2 to 3 minutes. Remove with a slotted spoon and dry on paper towels. Bake 10 minutes to continue drying and to soften the peppers
In a large saute pan or skillet, heat the oil over medium-high heat. Add the onions and chopped bell peppers and cook, stirring, until soft, about 3 minutes. Add the beef, garlic, parsley, salt, black pepper, and pepper flakes. Cook until the meat is browned, stirring with a heavy wooden spoon to break up the lumps, about 6 minutes. (drain to reduce fat content) Add the rice and pasta sauce and stir well.
Pour enough water into a baking dish to just cover the bottom, about 1/8-inch deep. Stuff the bell peppers with the rice mixture and place in the baking dish. Bake until the peppers are very tender and the filling is heated through, 25 to 30 minutes. Cover with mozzarella cheese, bake 5 additional minutes

Remove from the oven, and let rest for 10 minutes before serving.

enjoy!

Monday, February 7, 2011

Taco Soup

  • Taco Soup
    I make this in my slow cooker, but you can do it stove top as well, just plan on giving it about an hour or so.

    • 2 pounds ground beef
    • 2 cups diced onions
    • 2 (15 1/2-ounce) cans pinto beans
    • 1 (15 1/2-ounce) can pink kidney beans
    • 2 (15 1/4-ounce) can whole kernel corn, drained
    • 1 (14 1/2-ounce) can Mexican-style stewed tomatoes
    • 1 (14 1/2-ounce) can diced tomatoes
    • 1 (14 1/2-ounce) can tomatoes with chilies
    • 2 (4 1/2-ounce) cans diced green chilies
    • 1 (1 1/4-ounce) package taco seasoning mix
    • 1 (1-ounce) package ranch salad dressing mix
    • Corn chips, for serving
    • Sour cream, for garnish
    • Grated cheese, for garnish (I like pepper jack or mozzarella)

    *optional: 2 tsp each: basil, parsley, oregano

    1. Brown the ground beef and onions in a large skillet; drain the excess fat, then transfer the browned beef and onions to a large slow cooker or a stockpot.

    *For extra flavor in the meat, add basil, parsley and oregano and allow to simmer for a few extra minutes.  It might not sound like it "fits" into a mexican recipe, but it gives the meat much more flavor, and it really adds to the depth of the dish.

    2. Add the beans, corn, tomatoes, green chilies, taco seasoning, and ranch dressing mix, and cook in a slow cooker on low for 6 to 8 hours or simmer for about 1 hour in a pot on the stove.

    3. Ladle soup over crushed corn chips. Top with sour cream & cheese ENJOY!

    * If you use the slow cooker, add the corn closer to the end so it's still pretty crisp, to keep the dish bright and the texture firm.

Wednesday, January 19, 2011

Slow Cooker Pulled Pork

1/2 Cup Ketchup
1/3 Cup Worcestershire
1/3 Cup Apple Cider Vinegar
1 Tablespoon Ground Mustard
1 Tablespoon Garlic Powder
1/4 Cup Brown Sugar
1 Teaspoon Smoked Paprika
Dash Red Chili Pepper Flakes
Pinch Salt and Pepper
1 Medium red Onion, Chopped
3 Pounds Pork Shoulder, Trimmed of Fat.


Method
1. Combine all ingredients except for onion and pork into crock pot. Whisk all ingredients until well blended.
2. Place pork and onions into mixture, coating both sides of meat.
3. Cook for 8 to 10 hours under "low" slow cooker setting.
4. After meat is cooked, remove from slow cooker onto plate and break apart with fork. If meat has any bones, please discard at this time.
5. Place meat back into warm sauce to reheat.
6. Serve on hamburger buns or Rolls.
7. Enjoy.

Optional: I usually top the sandwich with coleslaw

Saturday, January 15, 2011

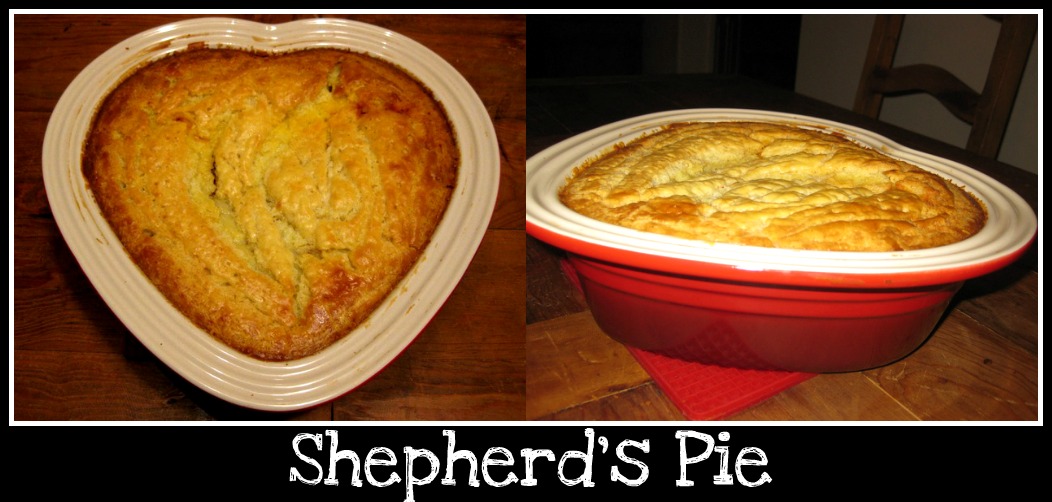
Paula Dean's Shepherd's Pie

Shepherd's Pie

Ingredients:

  • 1 small onion
  • 1 1/2 pounds ground beef
  • 2 (8-ounce) cans tomato sauce
  • 1 1/2 cups mixed vegetables or niblet corn, prepared
  • Salt and freshly ground black pepper
  • 1 tsp each: Basil, Parsley, Oregano, Garlic Powder
  • 8 to 10 medium red new potatoes
  • 1 1/2 cups milk
  • 12 tablespoons butter
  • 1/2 cup sour cream
  • 2 cups instant biscuit mix

Directions:

Preheat oven to 350 degrees F.

Beef Layer: Saute onions in 2 tablespoons butter. Add ground beef and 1 tsp each: Basil, Parsley, Oregano, Garlic Powder . After beef is browned, drain and add tomato sauce; Mix in vegetables. Add salt and pepper, to taste.

Potato Layer: Peel and slice potatoes 1/4-inch thick. Cook in boiling water for approximately 15 minutes or until fork-tender. Whip potatoes with electric mixer; mix until moderately smooth. Don't over beat them; a few lumps are nice. Add 1/2 cup heated milk, 1/2 cup butter, and sour cream. Salt and pepper, to taste. Whip until mixed. Adjust thickness by adding more milk, if desired.

Biscuit Layer: Combine biscuit mix and 1 cup milk. The mix should be thinner than normal biscuit mix but not runny.

Grease a 9 by 9 by 2-inch pan, or any similar casserole dish. Layer half way up with the mashed potatoes. Next, spread a layer of mixed vegetables or niblet corn on top of potatoes. Then add a layer of the meat. Pour biscuit mix over meat. Melt 4 tablespoons of butter and drizzle over top. Bake for approximately 35 to 45 minutes until top is golden brown.

Saturday, January 1, 2011

Lilypie Premature Baby tickers

Lilypie Premature Baby tickers